Dreamweaver MX 2004 on Windows 10/11 Home
article: David Dossiere
date: revised December 6, 2023
In this edition you will learn how to install Dreamweaver MX 2004 on Microsoft Windows 10/11 Home.
You can design and test your Classic ASP code prior to FTP your files to your Domain. You can write CSS, HTML5, Javascript, VBScript, PHP, Responsive Design and more.
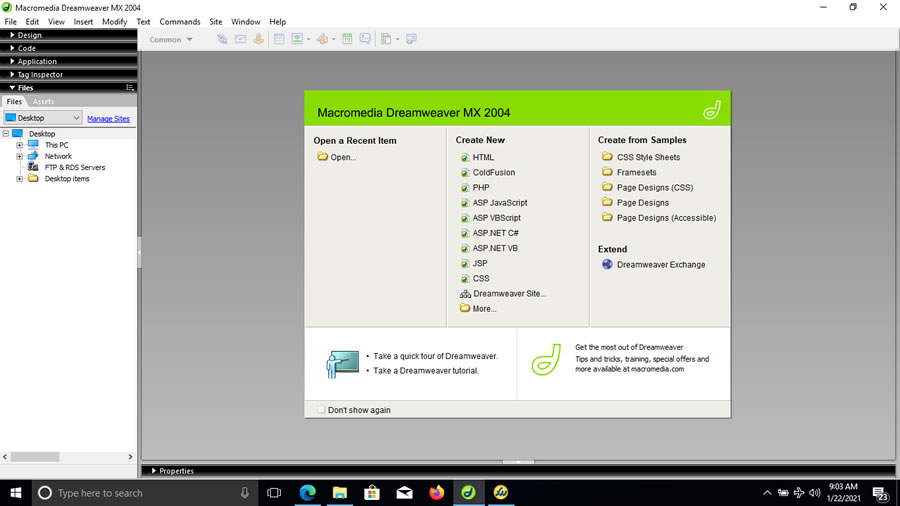
Step 1. Open Dreamweaver MX 2004.
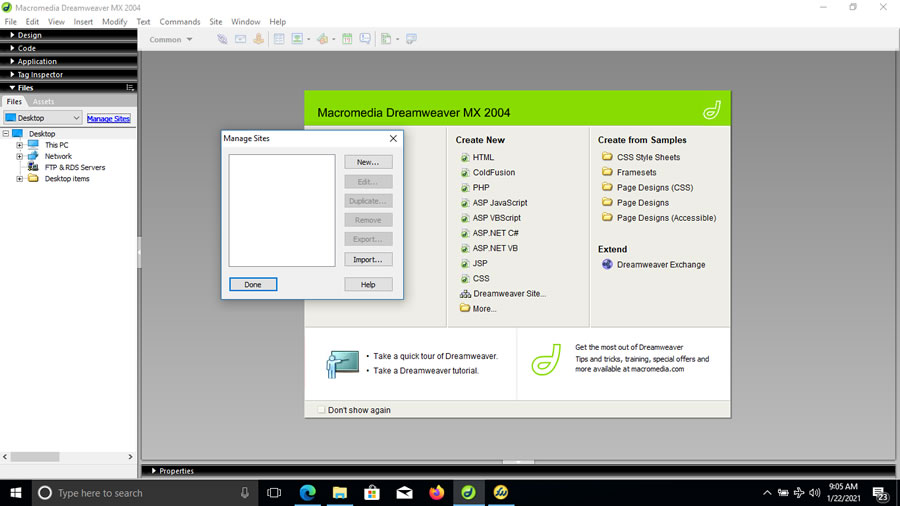
Step 2. Click Manage Sites.
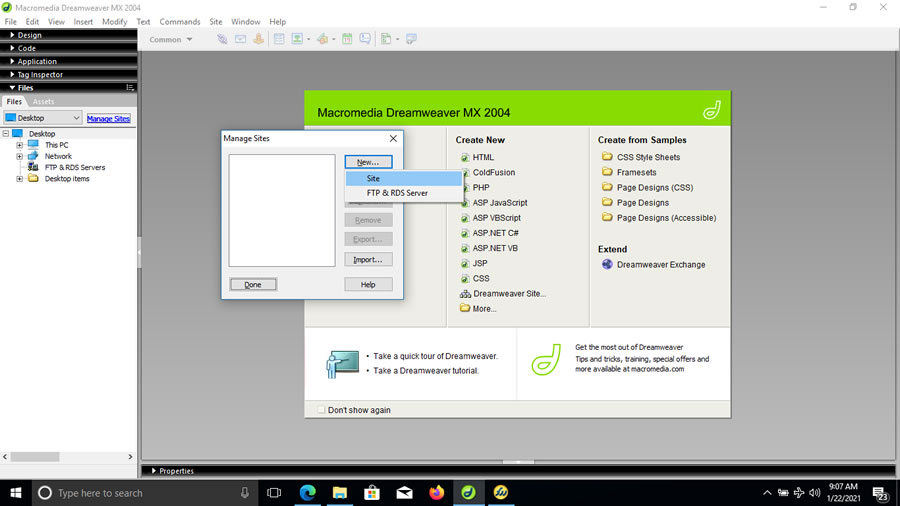
Step 3. Click New / Site.
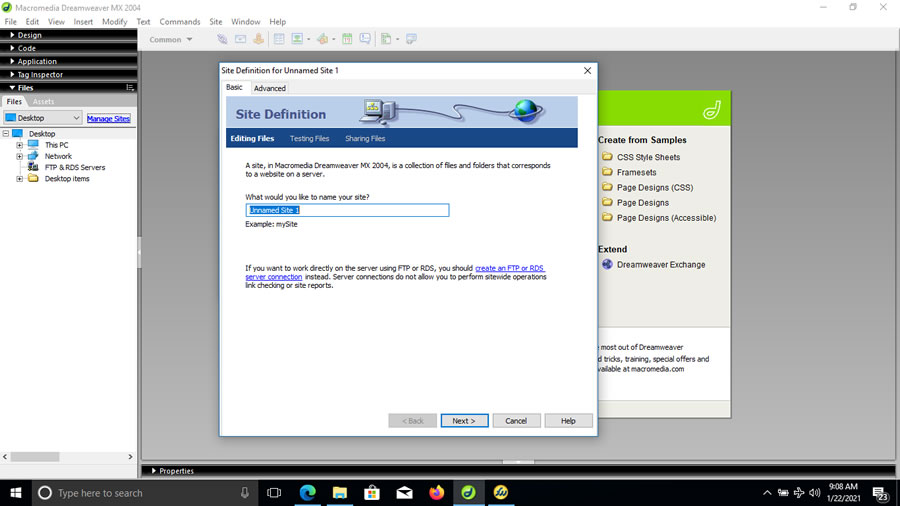
Step 4. Under Site Definition enter your domain name and Click Next.
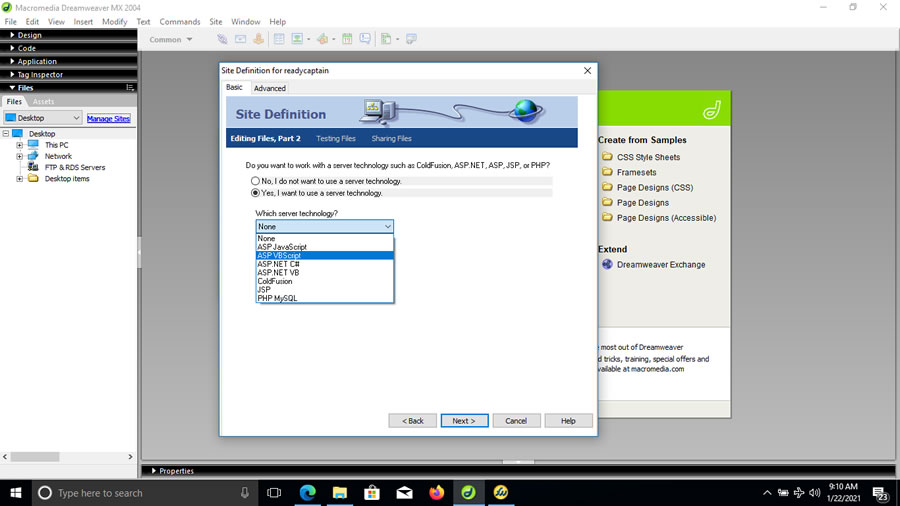
Step 5. Under Site Definition, choose Yes I want to use server technology, ASP VBScript and Click Next.
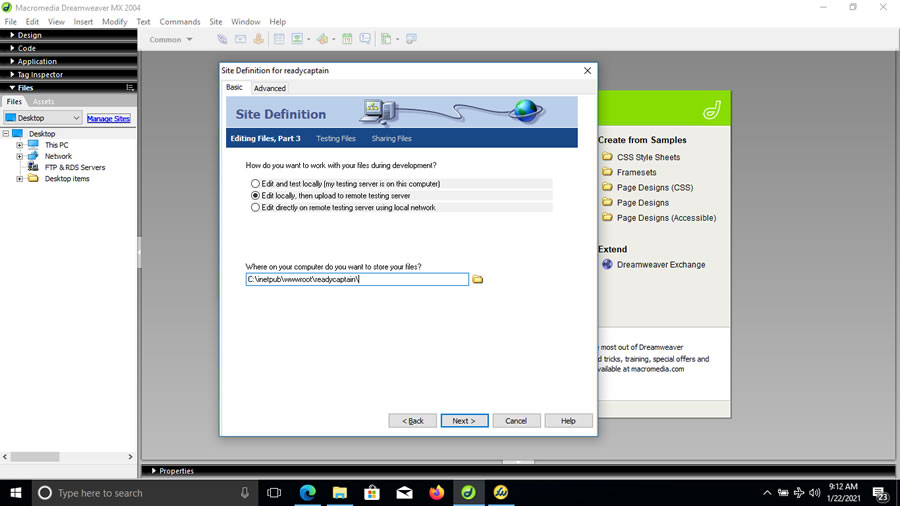
Step 6. Under Site Definition, choose Edit locally, then upload to remote testing server.
Where on your computer to you want to store your files? Choose your local disk / wwwwroot / domain / and Click Next.
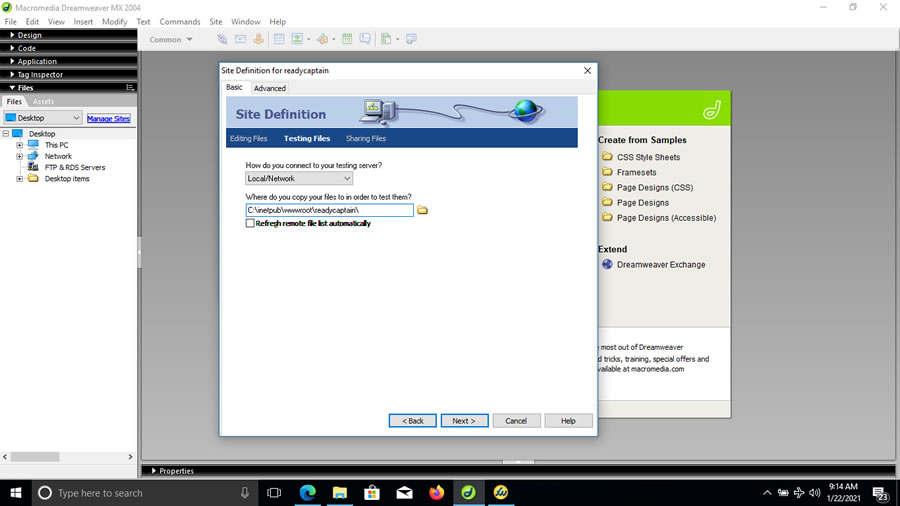
Step 7. Choose the same information as SHOWN and Click Next.
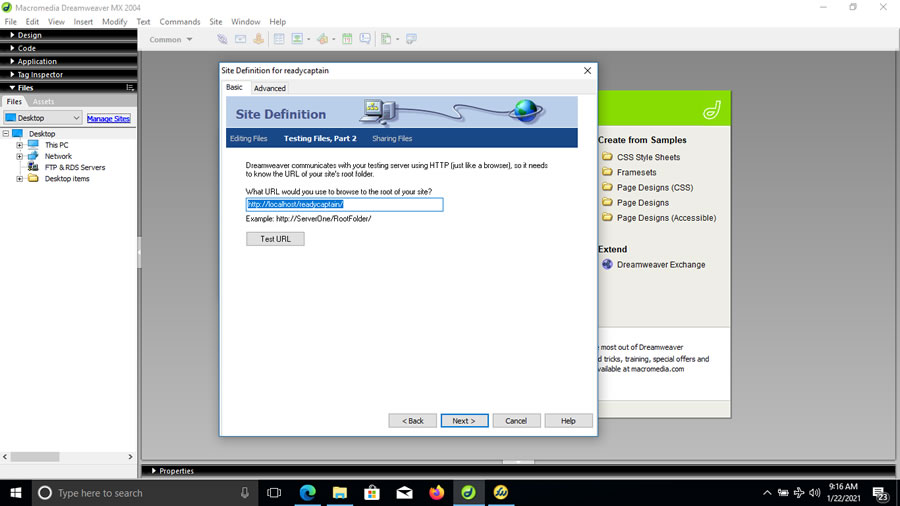
Step 8. Type http://localhost:8080/index.asp.
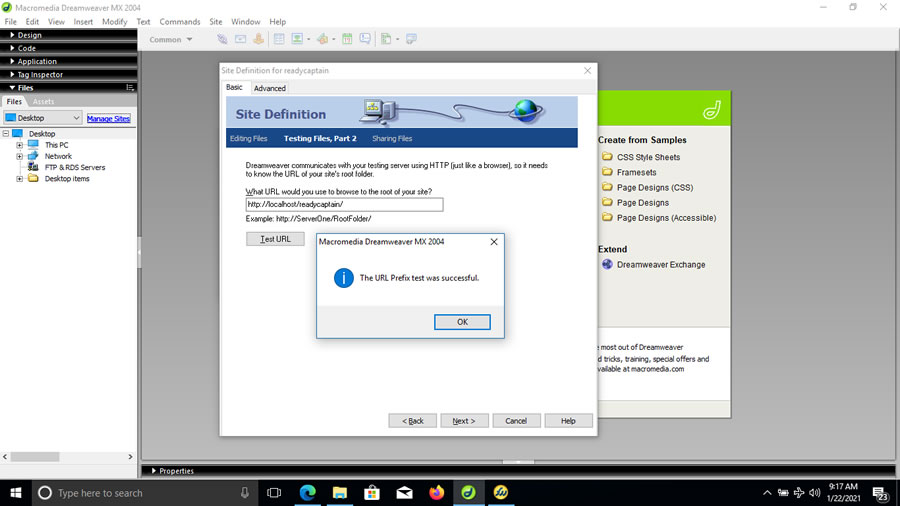
Step 9. Click Test URL button. You should see the message box as SHOWN and Click OK.
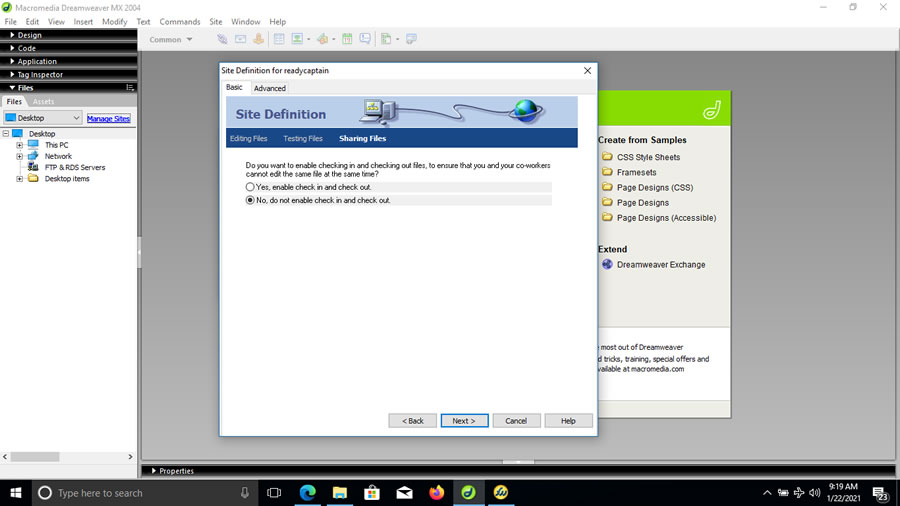
Step 10. Under Sharing Files you can choose Yes if more than 1 person will work on your website.
Once a file is checked out nobody can work on that file until it is checked back in. I chose No since I am working exclusively on
building my website Ready Captain. Click Next.
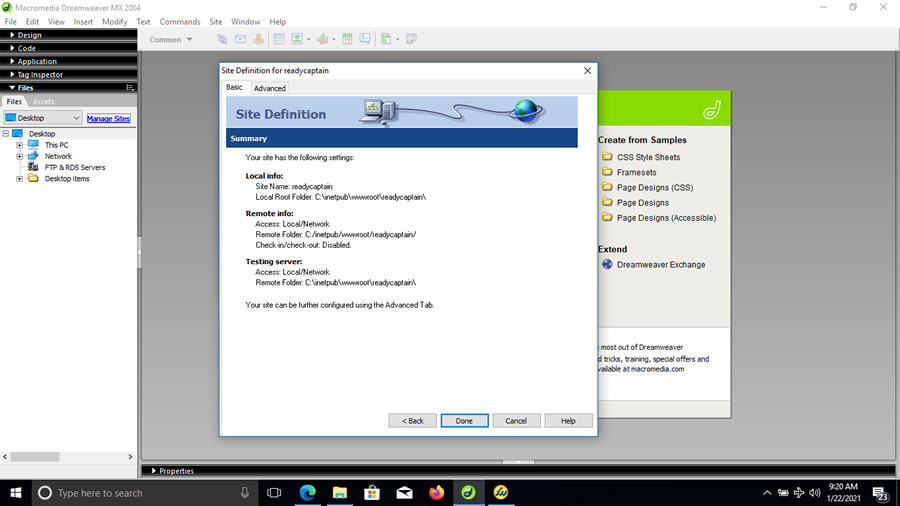
Step 11. Your Summary page should be as SHOWN. Click Done. You can start to code and design your website.