
IIS on Windows 10/11 Home
article: David Dossiere
date: revised December 6, 2023
In this edition you will learn how to install IIS on Microsoft Windows 10/11 Home.
You can design and test your Classic ASP code prior to FTP your files to your Domain. You can write CSS, HTML5, Javascript, VBScript, PHP, Responsive Design and more. You can also use a file management system like DreamWeaver which I will add later.
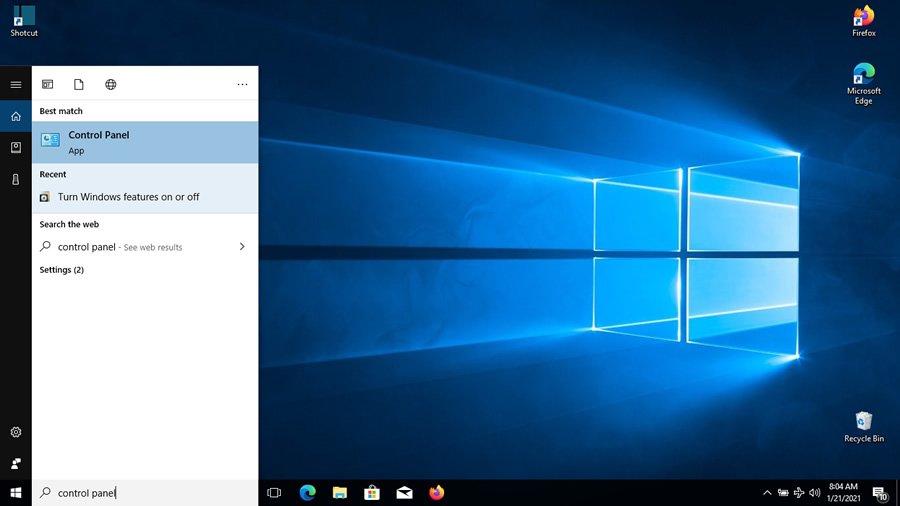
Step 1. Type Control Panel in the Windows search bar.
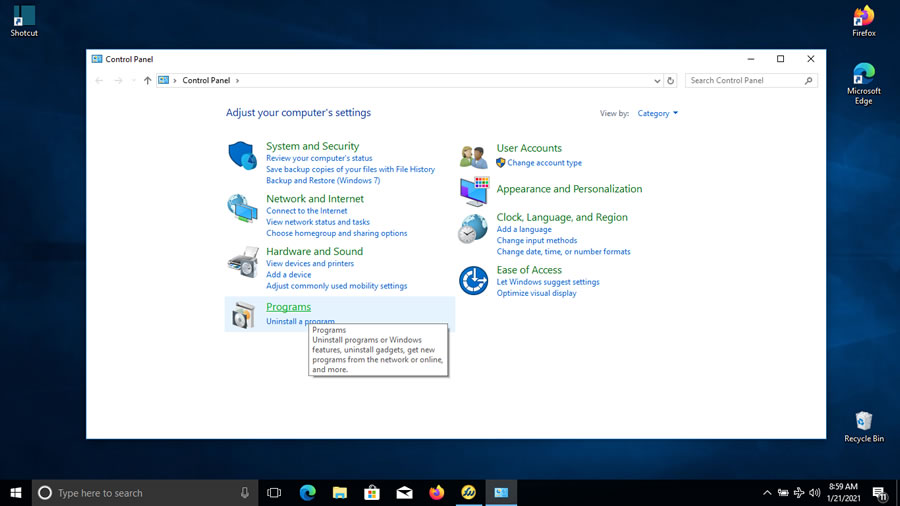
Step 2. Under Adjust your computer's settings, Select Programs.
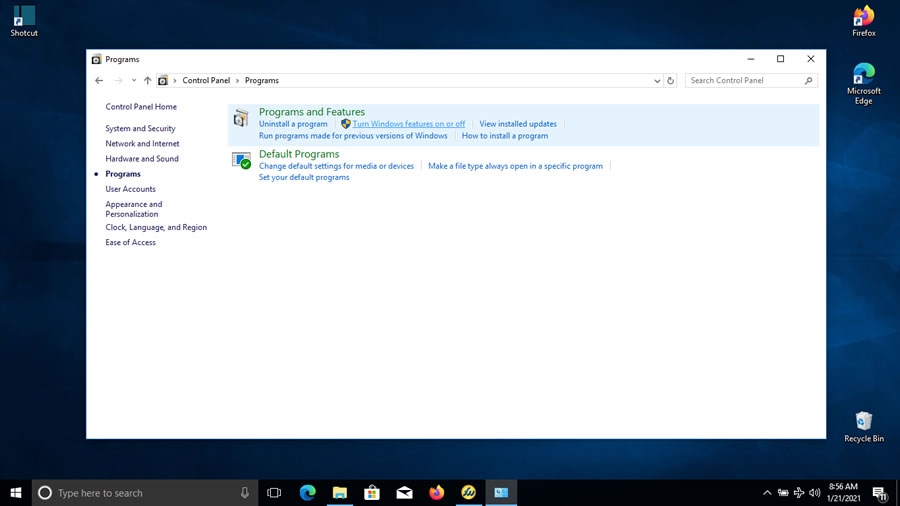
Step 3. Under Programs and Features, Select Turn Windows features on or off.
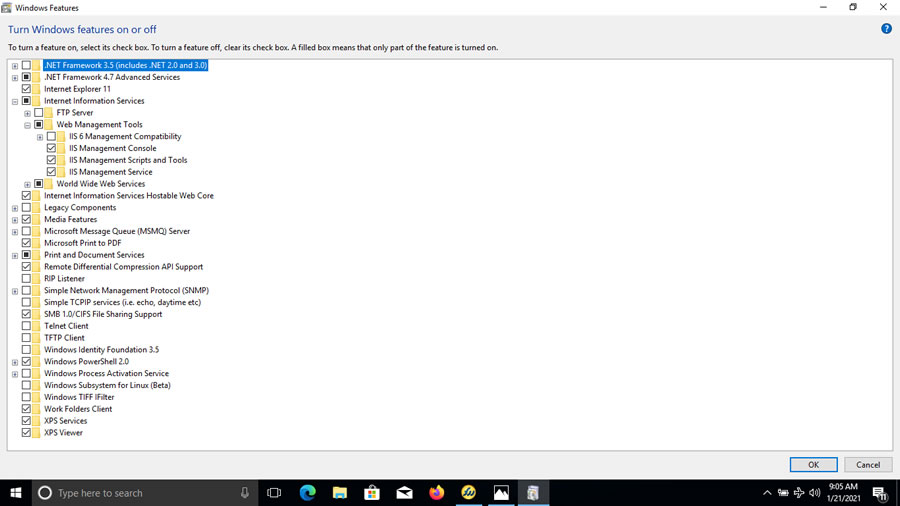
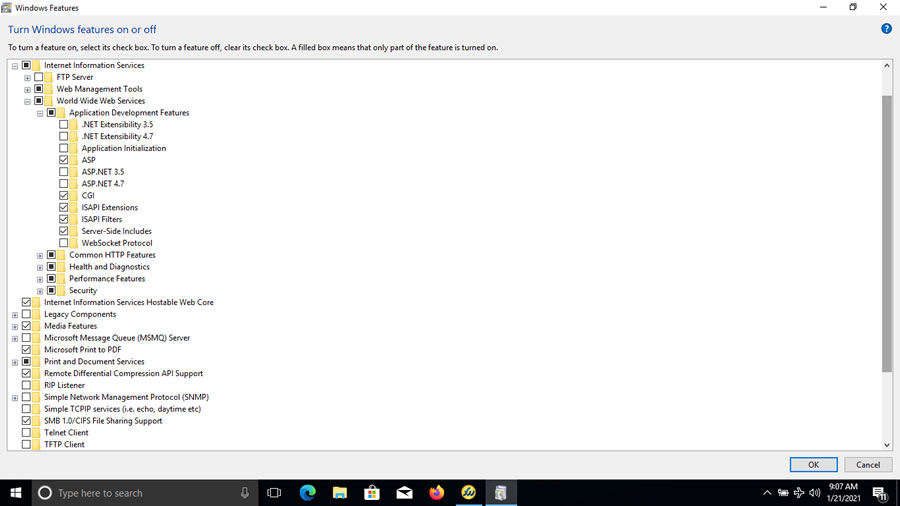
Step 4. Under Internet Information Services and Internet Information Services Hostable Web Core, make sure each item is CHECKED as shown.
Step 5. Open + World Wide Web Services / Application Development Features and make sure each item is CHECKED as shown.
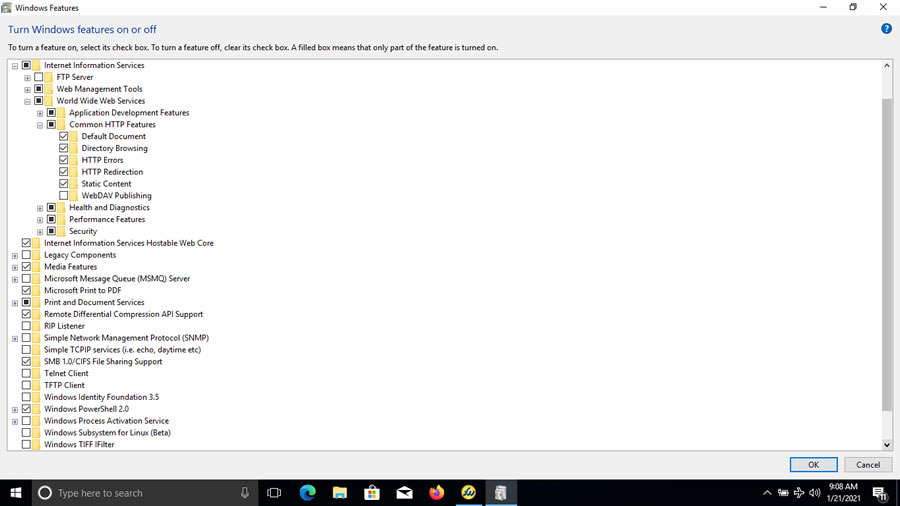
Step 6. Open + Common HTTP Features and make sure each item is CHECKED as shown.
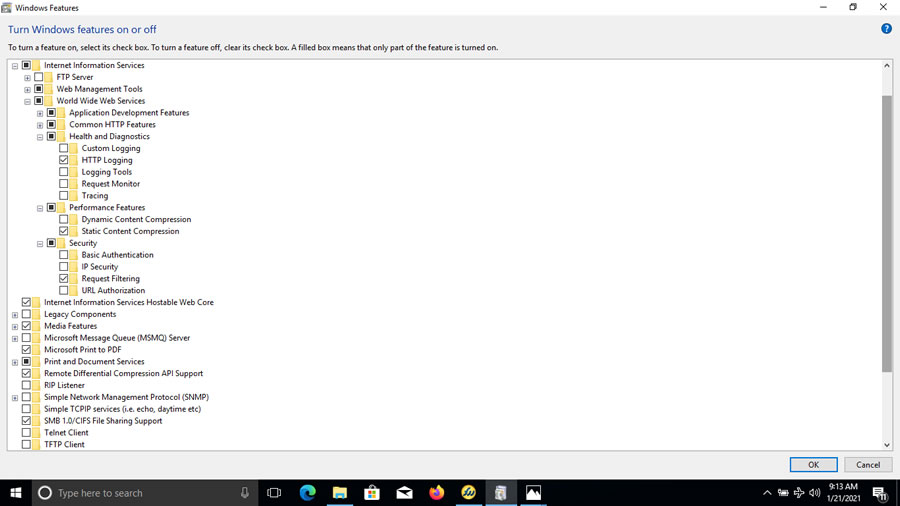
Step 7. Open + Health and Diagnostics / Performance Features / Security and make sure each item is CHECKED as shown and Hit OK. The necessary files will be installed.
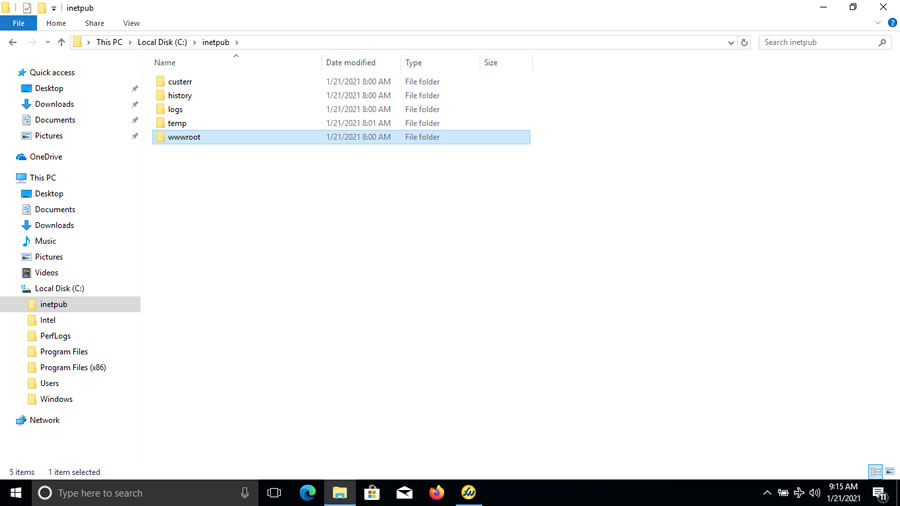
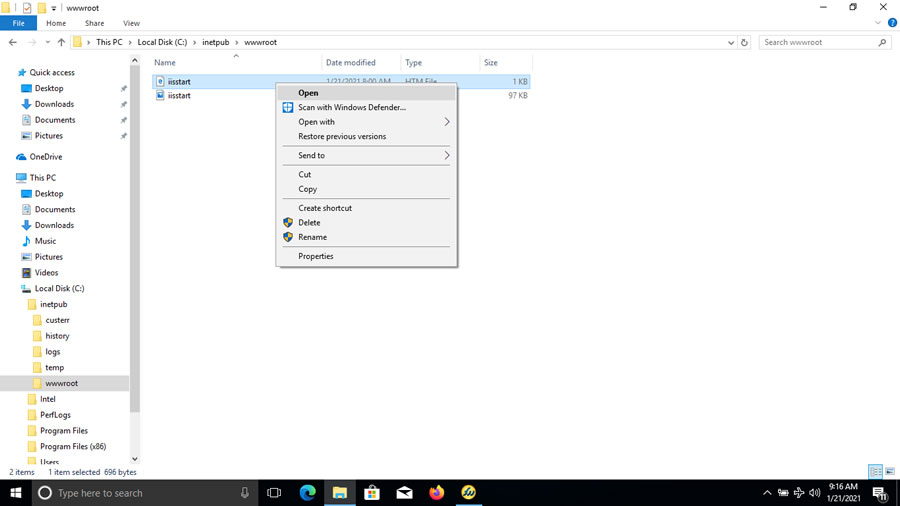
Step 8. Open Explorer and go to Local Disk / inetpub / wwwroot /.
Step 9. Right click iistart file and select Open.
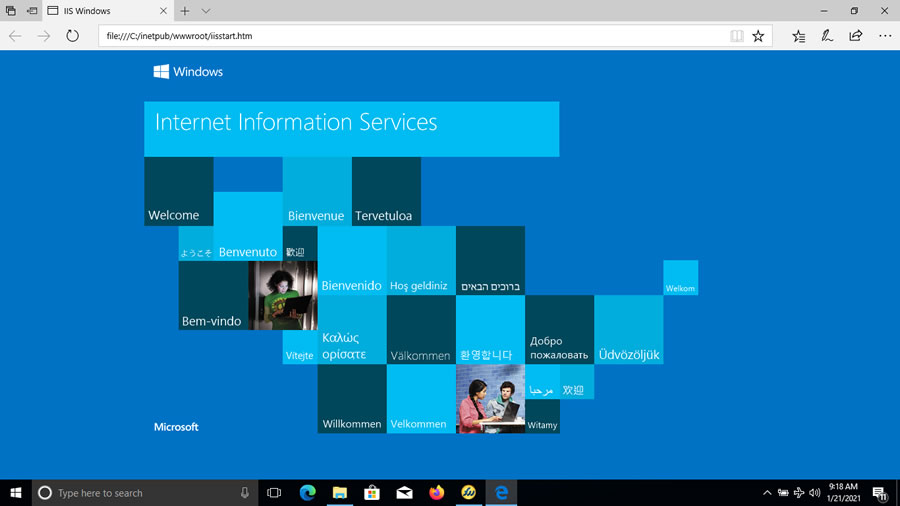
Step 10. Congratulations. IIS has started as shown.
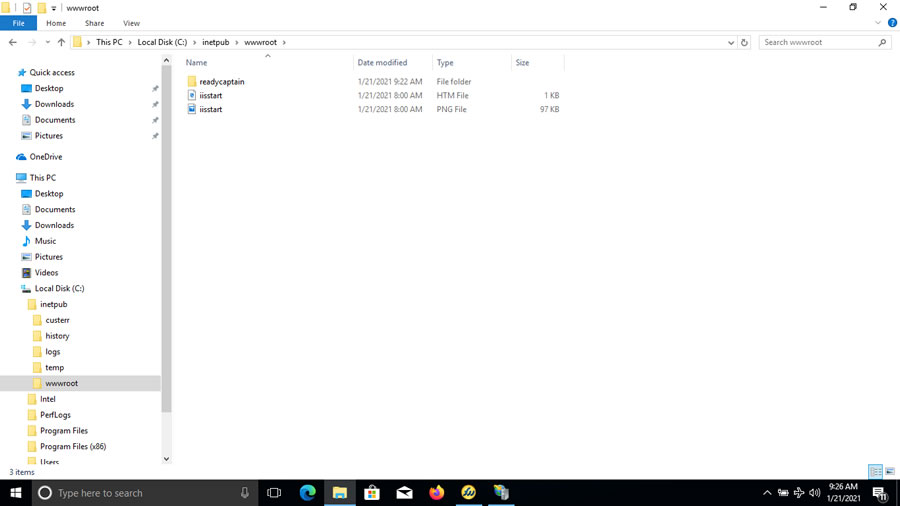
Step 11. Create your domain folder as SHOWN. In this example I am using my domain name readycaptain. If you have an existing website and directories you SHOULD paste them now.
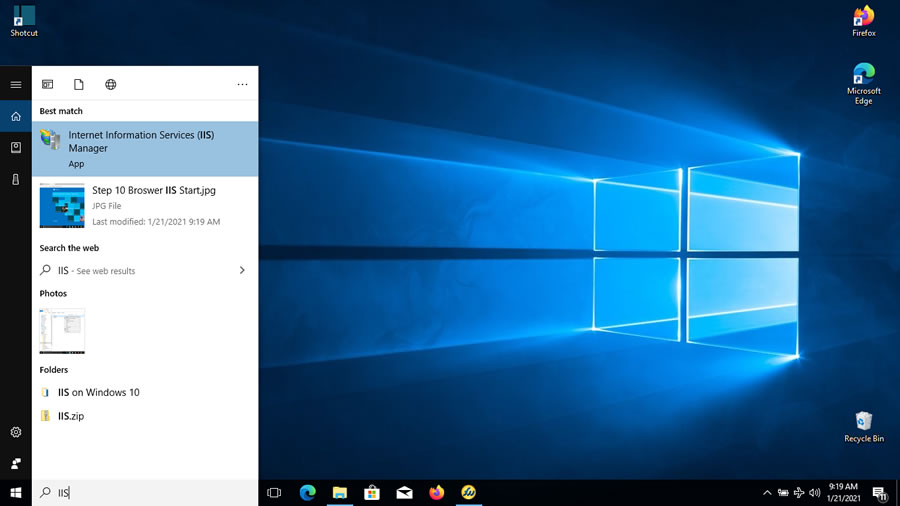
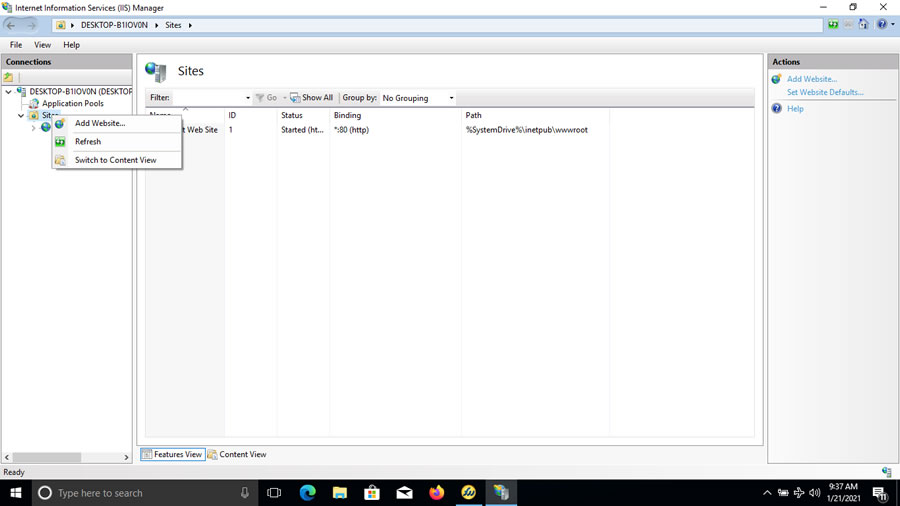
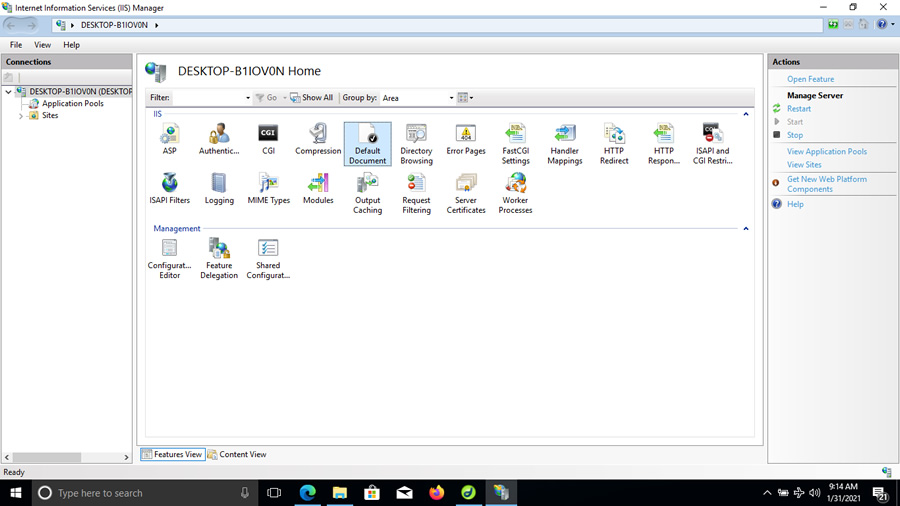
Step 12. Type IIS in the Windows search bar.
Step 13. Right-click Sites / Add Website.
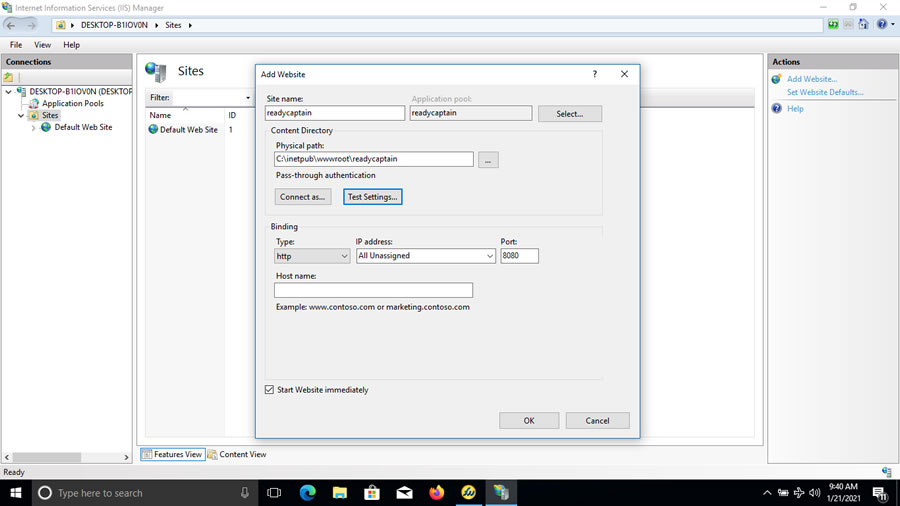
Step 14. Enter information as shown under Add Website / Site Name / Physical Path / Change Port number to 8080 and Click OK. The Default Web Site port 80 is already TAKEN so 8080 or 8081 and so on is needed.
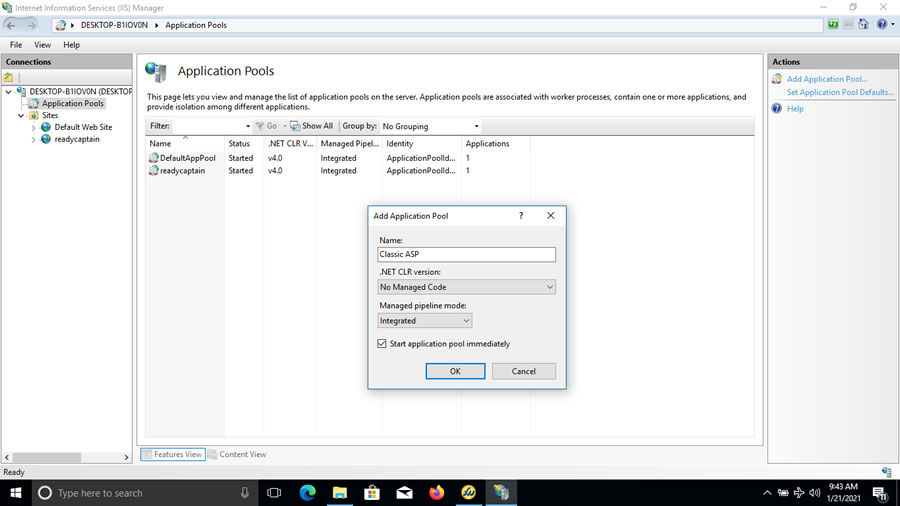
Step 15. Under Application Pools enter information as shown and Click OK.
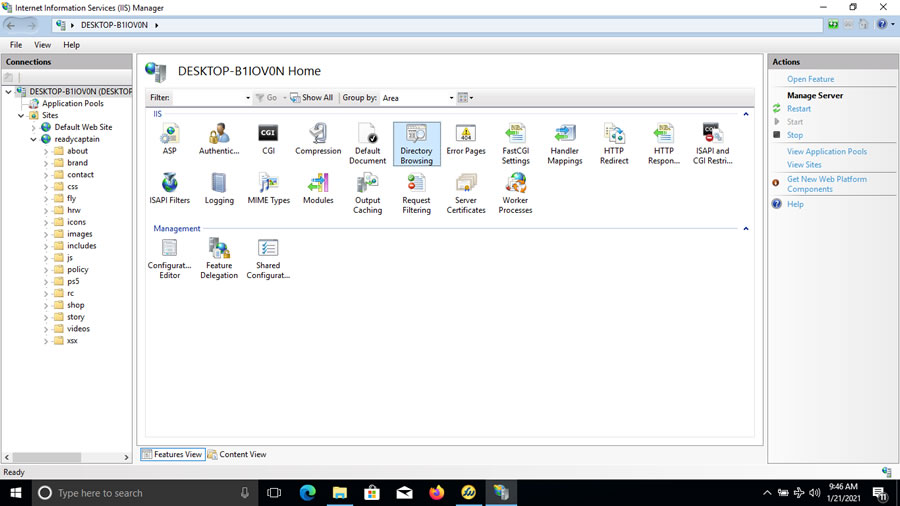
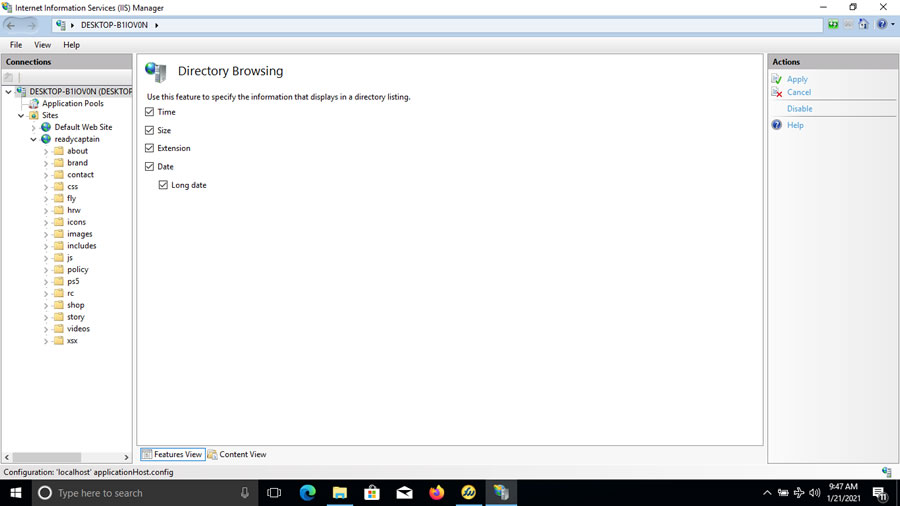
Step 16. Select Directory Browsing.
Step 17. Check the information under Directory Browsing as shown and click Apply.
Step 18. Select Default Documemt.
Step 19. Choose Add and type index.asp. This will make index.asp your default home page.

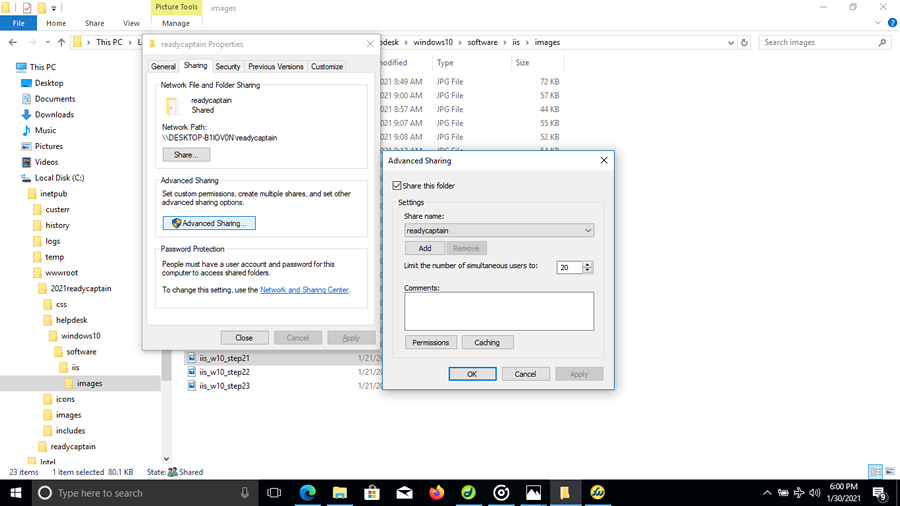
Step 20. In Explorer, click inetpub / wwwroot / choose your domain, right-click and select Properties / Sharing Tab / Advanced Sharing / Check Share this Folder and Hit Ok.
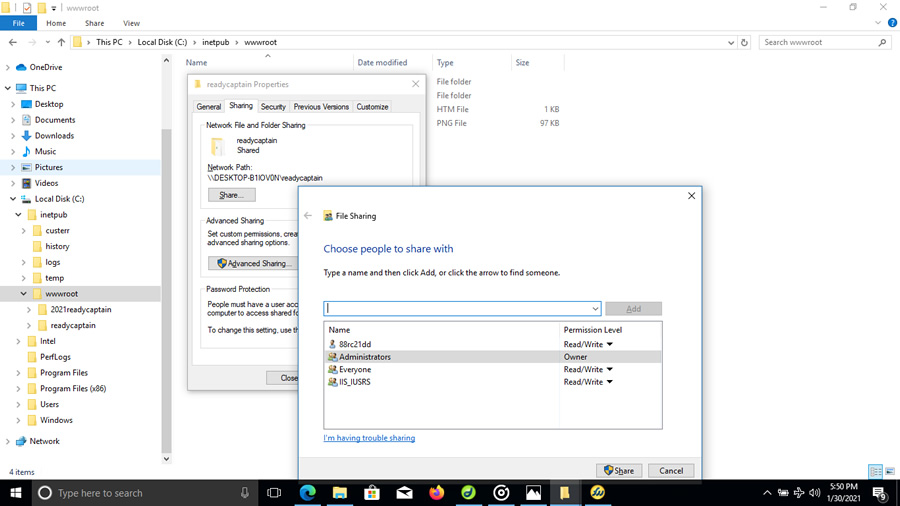
Step 21. In Explorer, click inetpub / wwwroot / choose your domain, right-click and select Properties / Sharing Tab / Share button and add Everyone and IIS_IUSRS with Read/Write Permission Level and Click Share.
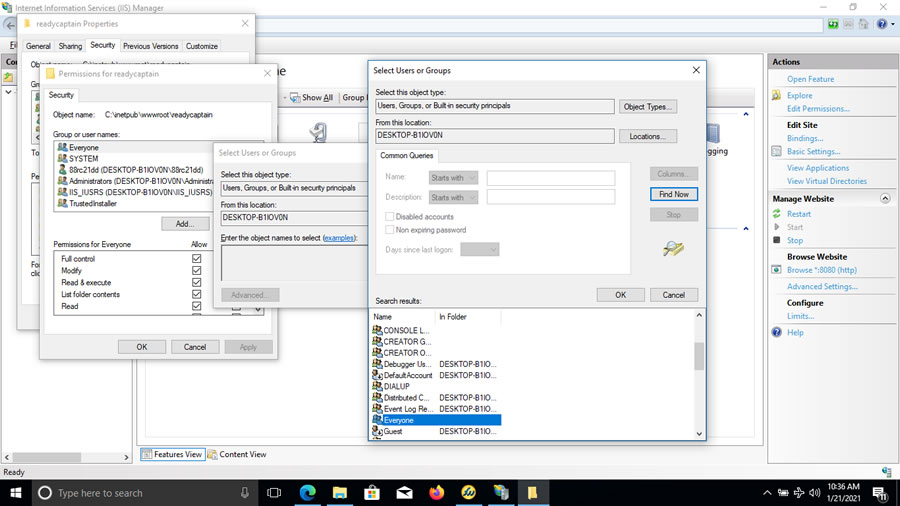
Step 22 In Explorer, click inetpub / wwwroot / choose your domain, right-click and select Properties / Security Tab / Add Everyone and IIS_IUSRS using Select Users or Groups and Click Find Now button. Click OK. Make sure to check Permission level is the same as shown under the Security tab,
Step 23 Open your browser. Type http://localhost:8080/index.asp. Great job. Now you can begin to build your website and test all your code from Classic ASP, Javascript, VBScript, HTML5, Responsive design, PHP etc...
If you want to code in ASP.net go back to the Control Panel / Turn Windows Features on or off / IIS / and Add ASP.net